

How to Convert a 220V AC Ceiling Fan into an Energy-Efficient BLDC Fan: A Complete Step-by-Step Guide
Rising electricity bills and growing awareness of energy efficiency have pushed many homeowners and DIY enthusiasts to look for smarter alternatives to their old, power-hungry ceiling fans. One of the most practical solutions gaining popularity today is converting a traditional 220 volt AC ceiling fan into a modern BLDC (Brushless DC) ceiling fan. This conversion not only reduces power consumption significantly but also delivers quieter operation, smoother airflow, and a longer motor lifespan. In this comprehensive guide, we'll walk you through the entire conversion process — from disassembling the original AC motor to installing a BLDC conversion kit and testing the finished fan — so you can understand exactly how this transformation works and whether it's a project you'd like to tackle yourself.
Understanding the Difference Between AC and BLDC Ceiling Fans
Before diving into the conversion steps, it's important to understand why this upgrade is worth considering in the first place. Traditional ceiling fans rely on an induction motor that runs directly on 220 volt alternating current. These motors are simple and reliable, but they are inherently inefficient, often consuming between 70 and 80 watts of power even at moderate speeds. A BLDC fan, on the other hand, uses a brushless direct current motor controlled by an electronic circuit board. This motor design uses permanent magnets and precise electronic commutation instead of mechanical brushes, which dramatically reduces energy loss from friction and heat. As a result, most BLDC ceiling fans consume only 25 to 35 watts while delivering the same or even better airflow than their AC counterparts. Beyond energy savings, BLDC motors also tend to run cooler, quieter, and with less vibration, which extends the overall lifespan of the fan. For anyone paying close attention to their monthly electricity costs, understanding this fundamental difference makes the case for conversion clear before a single tool is even picked up.
Disassembling the Original AC Fan Motor
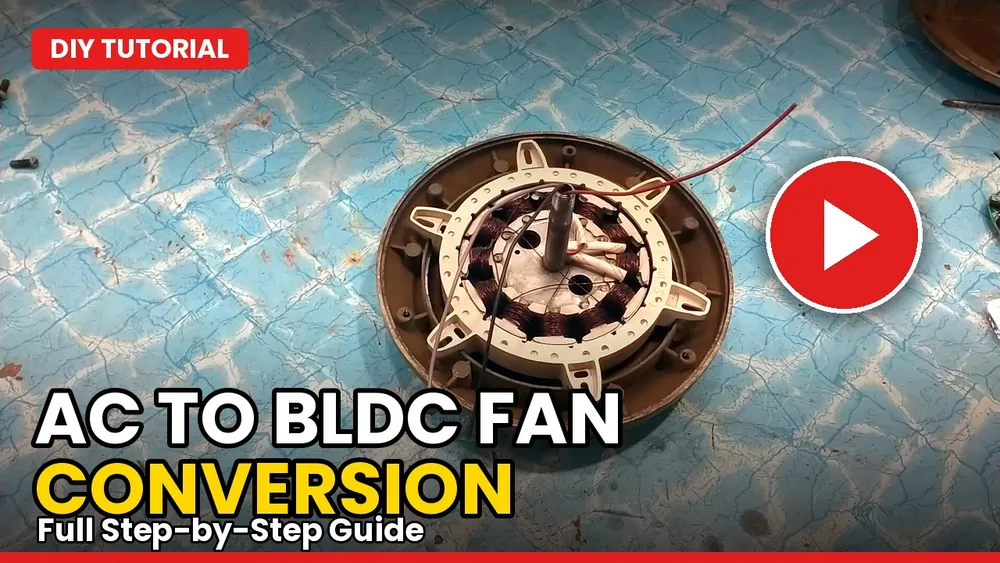
The conversion process begins with carefully opening up the existing 220 volt AC ceiling fan. Safety comes first here — the fan must be completely disconnected from the power supply and placed on a stable, clean workbench before any tools touch it. Once unplugged, the outer cover screws and protective housing components are removed to expose the internal motor assembly, revealing the rotor and stator that make up the traditional induction motor. Working patiently at this stage is essential, since rushing can easily damage the mechanical parts that may still be reused later in the assembly. The rotor is then carefully separated from the stator by removing the shaft and bearing assembly, followed by extracting the stator core from the fan body entirely. Once everything is disassembled, it's good practice to inspect every component and clean away any accumulated dust, grease, or debris, since years of continuous operation tend to leave residue that can interfere with the new BLDC components. This cleaning step also gives you a chance to assess the overall condition of the fan's mechanical housing and shaft before moving forward with the conversion.
Installing the BLDC Conversion Kit
With the old motor components removed and cleaned, the next phase involves installing the actual BLDC conversion kit, which typically includes a magnetic rotor, a compatible stator, and an electronic controller. The rotor core, which comes pre-fitted with permanent magnets, is mounted inside the lower cover of the ceiling fan. Getting this alignment right matters a great deal — the magnet assembly needs to be centered precisely and fixed securely so that it can spin freely without brushing against any surrounding parts. Any misalignment at this stage can lead to poor performance, unwanted noise, or premature wear later on. Once the magnetic rotor is properly seated, the new stator is positioned inside the fan housing and aligned directly with it. The stator is then fastened securely using either the fan's original mounting points or the hardware supplied with the conversion kit. Before moving to the next step, it's worth manually rotating the rotor by hand to confirm that it spins freely and that there is an even, consistent air gap between the magnets and the stator all the way around. These conversion kits are widely available through local electronics markets and online retailers, and using a good-quality kit makes a noticeable difference in how smooth and quiet the final fan operates.
Securing the Shaft and Prioritizing Safety
A step that's easy to overlook but absolutely critical for long-term safety is properly locking the fan shaft in place. This involves drilling a small locking hole into the shaft at a specific point and then installing a locking pin or bolt to keep everything firmly secured. This is not an optional cosmetic step — if the shaft isn't properly locked, the fan assembly can gradually loosen over time due to constant rotation and vibration, and in worst-case scenarios, it could even detach or fall during operation. Since ceiling fans hang above living spaces where people spend significant time, this represents a genuine safety hazard that should never be taken lightly. Taking the extra few minutes to drill accurately, fit the locking pin correctly, and tighten everything to spec is a small investment that protects against a potentially serious accident down the line. Any DIY electrical or mechanical project involving overhead installations should always treat structural security as a non-negotiable priority, and this conversion is no exception.
Wiring the BLDC Controller Correctly
Once the mechanical assembly is complete, attention turns to installing and wiring the BLDC controller, which is the electronic brain that governs how the converted fan operates. This controller manages power flow to the motor and enables the smooth, efficient performance that makes BLDC fans so appealing in the first place. A typical controller used in these conversions has seven wires, each serving a distinct function. Two wires handle the 12-volt DC power input that feeds the controller itself, another two wires manage the 220 volt AC input connecting to the household power source, and the remaining three wires connect directly to the stator windings to drive the three-phase BLDC motor. Fortunately, most quality conversion kits label these wire functions directly on the controller body, making it much easier to identify which wires go where without guesswork. Still, it's essential to follow these markings carefully and double-check every connection before considering the wiring complete, since incorrect connections at this stage can damage the controller, the motor, or both. Taking time here to verify polarity and connection points pays off enormously when it comes time to power the fan on.
Final Testing and Safety Precautions
After all wiring and mechanical assembly are finished, the project reaches its most satisfying stage: testing the converted fan. Before switching on the power, every connection should be inspected one more time to confirm that wires are firmly attached and properly insulated, since loose or exposed wiring poses both a performance risk and a safety hazard. Once everything checks out, the fan can be powered on and observed closely as it starts up. A successful conversion shows itself through smooth startup, stable speed, and notably quiet operation compared to the original AC motor. It's wise to monitor the fan closely during its first few minutes of operation, watching and listening for anything unusual such as odd sounds, vibrations, or signs of overheating, since these symptoms would indicate a wiring or alignment issue that needs to be addressed before regular use. It's worth emphasizing that working with 220 volt AC electricity carries real risk of serious injury, electric shock, or worse if handled improperly, so this type of project should only be attempted by individuals who have appropriate electrical knowledge, experience, and the right safety equipment on hand. Always disconnect power before working on any electrical device, follow local electrical codes, and treat every stage of this conversion — from disassembly to final testing — with the level of caution that overhead electrical fixtures deserve.
Final Thoughts
Converting a standard AC ceiling fan into a BLDC fan is a rewarding project that blends practical electronics knowledge with tangible energy savings. By understanding the differences between induction and brushless DC motors, carefully disassembling the original unit, precisely installing the new magnetic rotor and stator, securing the shaft, wiring the controller correctly, and thoroughly testing the final result, you can transform an old, inefficient fan into a modern, energy-saving upgrade. While the process requires patience, mechanical care, and a solid respect for electrical safety, the payoff — lower electricity bills, quieter operation, and improved performance — makes it a worthwhile undertaking for anyone comfortable working with hands-on electrical projects.
Frequently Asked Questions: AC to BLDC Ceiling Fan Conversion
| # | Question | Answer |
|---|---|---|
| 1 | What is a BLDC ceiling fan? | A BLDC (Brushless DC) ceiling fan uses a brushless direct current motor controlled by an electronic circuit board, offering higher efficiency and quieter operation than traditional AC motors. |
| 2 | Can a normal 220V AC ceiling fan be converted to BLDC? | Yes, a standard 220 volt AC ceiling fan can be converted using a BLDC conversion kit that includes a magnetic rotor, compatible stator, and an electronic controller. |
| 3 | How much power does a BLDC fan save compared to an AC fan? | While a typical AC fan consumes 70–80 watts, a BLDC fan usually consumes only 25–35 watts, cutting energy use by more than half. |
| 4 | What components are included in a BLDC conversion kit? | Most kits include a magnetic rotor with pre-fitted permanent magnets, a compatible stator, and an electronic controller with wiring. |
| 5 | Is it safe to convert a ceiling fan myself? | This project involves 220V AC electricity and should only be attempted by individuals with appropriate electrical knowledge, experience, and proper safety equipment. |
| 6 | Why is locking the fan shaft important during conversion? | Locking the shaft with a pin or bolt prevents the fan from loosening over time, which could otherwise cause it to become unstable or fall during operation. |
| 7 | How many wires does a typical BLDC controller have? | A typical BLDC controller has seven wires: two for 12V DC power input, two for 220V AC input, and three connecting to the stator windings. |
| 8 | How do I know which wire connects where on the controller? | Most quality conversion kits have wire functions clearly labeled or printed directly on the controller body to guide correct installation. |
| 9 | Why does the rotor need an even air gap from the stator? | An even air gap ensures the rotor spins freely without touching the stator, which is essential for smooth performance and preventing damage. |
| 10 | Do I need to remove the original AC motor completely? | Yes, the original rotor and stator are removed from the fan housing so the new BLDC magnetic rotor and stator can be installed in their place. |
| 11 | How can I tell if the conversion was successful? | A successful conversion results in a smooth startup, stable speed, and quiet operation with no unusual sounds, vibrations, or overheating. |
| 12 | What should I check before powering on the converted fan? | Double-check that every wire connection is firmly attached and properly insulated before switching on the power. |
| 13 | Are BLDC ceiling fans quieter than AC fans? | Yes, BLDC motors typically run cooler and with less vibration, resulting in noticeably quieter operation compared to traditional AC motors. |
| 14 | Where can I buy a BLDC conversion kit? | BLDC conversion kits are widely available through local electronics markets as well as online stores. |
| 15 | Who is responsible if something goes wrong during the conversion? | This type of project carries inherent electrical risk, and anyone attempting it does so at their own responsibility; always follow local electrical codes and safety regulations. |
Conclusion
Converting a standard 220 volt AC ceiling fan into a modern BLDC fan is a project that rewards patience and precision with real, lasting benefits. By replacing the traditional induction motor with a brushless DC motor, you cut energy consumption by more than half, reduce noise, and gain smoother, more reliable performance — all without having to buy a brand-new fan. The process, while detailed, follows a logical progression: opening and cleaning out the old motor, installing the magnetic rotor and stator with careful alignment, securing the shaft to eliminate any safety risk, wiring the controller correctly, and finally testing the fan to confirm everything runs as expected.
That said, this is not a project to rush or take lightly. Working with 220V AC electricity carries genuine risk, and every step — from the initial disassembly to the final power-on test — deserves careful attention and respect for proper safety practices. If you have the electrical knowledge, the right tools, and a good-quality conversion kit, upgrading your old ceiling fan to BLDC technology is one of the most cost-effective ways to make your home more energy-efficient while enjoying quieter, smoother airflow for years to come.
Discussion
No comments yet. Be the first to join the conversation!