
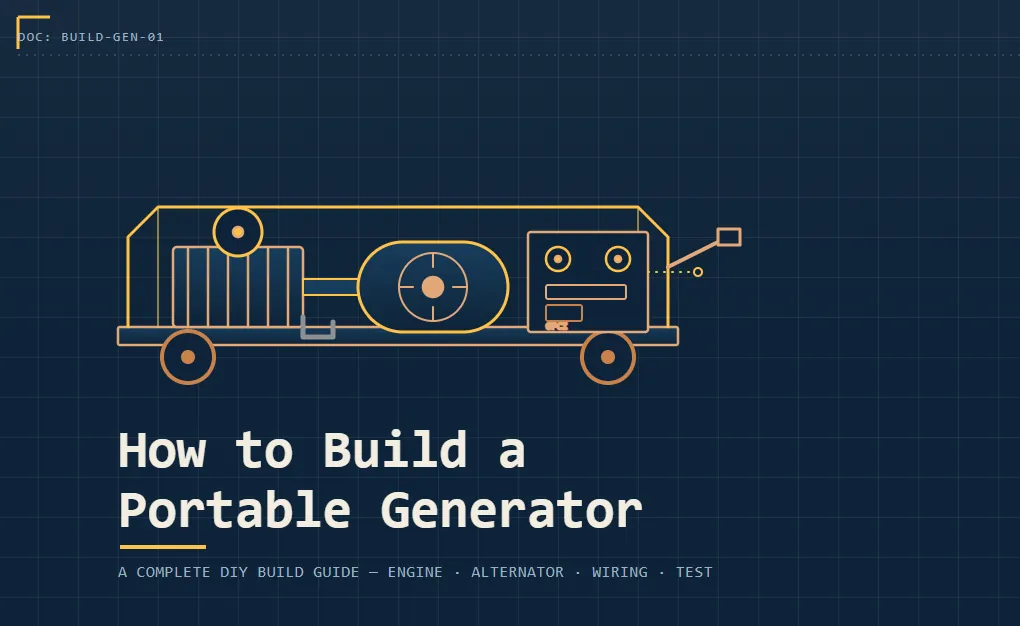
How to Build a Portable Generator
A ground-up schematic for pairing an engine with an alternator head, wiring a safe control panel, and testing the whole rig before you ever plug something into it.
Every portable generator on the market is really just three systems wearing a metal shell: something that burns fuel to spin a shaft, something that turns that spinning shaft into electricity, and something that gets the electricity out safely. Once you separate those three jobs, "build a generator" stops sounding like a factory-only project and starts looking like what it actually is — a weekend build you can do in a garage with common hand tools, a welder or a drill, and a shopping list you control end to end.
Building your own has three real advantages over buying a box off the shelf. You size the engine and alternator to the load you actually run, instead of paying for headroom you'll never use. You can service every part yourself because you installed every part yourself. And you can upgrade individual components — a bigger fuel tank, a quieter muffler, a digital control panel — without replacing the whole unit. The tradeoff is that you're responsible for getting the wiring and grounding right, which is the part of this guide we'll spend the most care on.
This walkthrough covers the full build in order: how the two core systems talk to each other, the parts and tools you'll need, a numbered assembly sequence from frame to first start, and a load calculator near the end so you can size your build against your real appliances instead of guessing.
A generator you build yourself carries the same electrical and carbon monoxide risks as one you buy. Never run any generator, homemade or manufactured, inside a garage, basement, or enclosed space, even with the door open. Keep it at least 20 feet from windows and doors, and install a battery-backed CO detector wherever you'll be sleeping while it runs.
01 How a generator actually works
Strip away the frame and fuel tank and a generator is two machines bolted together on a shared shaft. The first is a combustion engine — almost always a small single-cylinder gas or propane engine in the portable class — whose only job is to spin at a constant speed, typically 3,600 RPM for a 60Hz generator head. The second is the generator head itself, also called an alternator, which uses that spinning shaft to rotate a magnetic field inside a set of copper windings. That spinning field induces alternating current in the windings, which is what comes out the far end as usable AC power.
Two details in that description matter more than anything else in the build. First, the engine has to hold a steady RPM, because RPM is what determines your output frequency — that's the 60Hz (or 50Hz) figure that sensitive electronics expect to see. Small swings in engine speed under load show up as frequency drift, which is why governor adjustment gets its own step later in this guide. Second, the alternator's output has to pass through some form of voltage regulation before it reaches an outlet, or you'll get a voltage spike every time a load switches on or off. Most generator heads sold for this kind of build include a built-in automatic voltage regulator (AVR); if yours doesn't, that's a separate component you'll need to add to the wiring, not an optional extra.
There's a second category worth knowing about even if you don't build one: inverter generators. These add a step — the raw AC from the alternator is converted to DC, then re-synthesized into clean AC with an inverter circuit, which produces a much steadier sine wave for sensitive electronics like laptops and CPAP machines. Building a true inverter unit from scratch is a more advanced electronics project than this guide covers, since it means designing or sourcing an inverter board rated for your alternator's output. The build below is a conventional open-frame generator, which is the right starting project for a first build and is more than adequate for tools, lighting, and most household appliances.
02 Tools and parts
Buy the engine and generator head first — everything else on this list, from the frame dimensions to the wire gauge, is sized around those two components, so get their spec sheets in hand before you cut any metal.
Core components
Tools
On the electrical side, buy stranded copper wire rated for the full output current of your alternator, not just the current you expect to draw day to day — undersized wire is the single most common cause of overheating in home-built units. A quick rule of thumb: for a 120V circuit pulling up to 20A continuously, 12-gauge wire is the accepted minimum; step up to 10-gauge for anything approaching 30A.
03 Matching the engine to the alternator
The most common mistake in a first build isn't a wiring error — it's pairing an engine that can't sustain the alternator's rated load. Generator heads are rated in running watts and surge (starting) watts, and the engine driving them needs roughly 2 horsepower for every 1,000 running watts, with some margin for mechanical losses in the coupling and belt, if you're using one. A generator head rated for 5,000 running watts wants an engine in the 10–13 horsepower range, not the 6.5 horsepower engine that happens to be cheapest at the hardware store.
Undersizing the engine doesn't just limit your output — it also causes the engine to bog under load, which drags RPM down, which drags your output frequency and voltage down with it. That's the scenario that damages sensitive electronics, so treat the horsepower-to-wattage ratio as a hard constraint, not a place to save money.
Running watts (head rating) ÷ 500 ≈ minimum engine horsepower needed, with a bit of extra margin if you'll regularly hit surge loads from motors or compressors.
04 The build, step by step
Work through these in order. Each step assumes the previous one is torqued down and checked before you move on — generators run at high RPM, and a loose bolt at step 3 becomes a much bigger problem by step 9.
Build the frame
Cut your steel tube stock into a rectangular base sized to the footprint of your engine and alternator, with roughly 4–6 inches of clearance on every side for airflow and mounting hardware. Weld or bolt the base first, then add a raised cage or roll bar if you want the open-frame protection common on commercial units — this also gives you somewhere to bolt the fold-down handle and axle for the wheel kit later. Keep the frame low and the weight centered; a top-heavy frame is a tip hazard once the tank is full and the engine is running.
Mount the engine
Set the engine on its rubber vibration mounts and bolt those mounts to the frame rails, not directly to a thin sheet panel — you want the mounting force spread across structural tube. Leave the engine's final bolts snug but not fully torqued yet; you'll need a small range of adjustment when you align the coupling to the alternator in the next step.
Mount and align the alternator
Position the generator head so its shaft lines up with the engine's output shaft, then connect them with a direct coupling if the two are rated for the same RPM, or a belt-and-pulley setup if you need a ratio between engine speed and alternator speed. This is the step where a dial indicator earns its keep: run it around the coupling as you slowly rotate the shaft by hand, and shim the alternator's mounting feet until runout is under about 0.005 inches. Misalignment here doesn't just cause noise — it wears out bearings and seals on both the engine and the alternator far faster than normal use would.
Once alignment checks out, torque the alternator's mounting bolts to spec, then go back and fully torque the engine mounts you left snug in step 2.
Install the fuel system
Mount the fuel tank above the carburetor if you're running gravity feed, which is standard on small engines, and route fuel line with an inline shutoff valve and an inline filter between the tank and the carburetor. Secure the tank with straps rather than resting it loose on the frame, and keep the fill cap accessible without having to reach over the hot muffler side of the engine. If you're building a dual-fuel unit, this is also where you'd plumb in the propane regulator and a changeover valve, following the regulator manufacturer's pressure spec exactly.
Fit the exhaust and cooling path
Bolt the muffler and spark arrestor to the engine's exhaust port, angled so the outlet points away from the fuel tank and control panel. Leave clear airflow around the engine's cooling fins or fan shroud — boxing the engine in tightly with sheet metal traps heat and will shorten its life. If you're adding any panel skinning around the frame for looks or noise reduction, cut vents that match the engine manufacturer's cooling airflow diagram rather than guessing at vent size.
Wire the control panel
Run the alternator's output leads to a control panel mounted where you can reach it without leaning over the engine. At minimum, that panel needs a circuit breaker sized to the alternator's rated current, a GFCI duplex outlet for standard 120V loads, and a voltmeter or frequency meter so you can see what the unit is actually producing under load, not just assume it's fine. If your alternator produces 120/240V split-phase output, add a twist-lock 240V outlet as well, wired through its own breaker.
Keep runs short and use terminal lugs, not twisted bare wire, at every connection point. Every connection is a place resistance and heat can build up, and heat is the enemy of both wire insulation and the breaker's rated trip point.
Ground the frame
Bond the generator's frame to the alternator's ground terminal with a dedicated copper ground wire and a ground lug, not just a bolt shared with something else. A properly grounded frame gives fault current somewhere to go other than through a person touching the case, and it's what makes your GFCI outlet actually able to detect a fault in the first place. This step gets skipped more than any other on home builds, and it's the one most directly tied to whether someone gets hurt.
Add wheels and a handle, and do a final bolt check
Fit the axle and wheel kit to one end of the frame and a fold-down handle to the other, positioned so the unit balances close to level when you lift the handle. Before the first start, go over every bolt on the build — engine mounts, alternator feet, coupling, muffler, fuel line clamps, panel screws — with a torque wrench, in that order. It's the least exciting step and the one most worth doing carefully.
Before your first real load test, start the engine unloaded and check RPM with a tachometer against the spec for your target frequency — 3,600 RPM for 60Hz on a directly coupled 2-pole alternator. Adjust the governor per the engine manufacturer's instructions until it holds steady, then re-check after the engine reaches operating temperature, since governor settings can drift slightly as components heat up.
05 Direct drive vs. belt drive, and cutting down noise
Most small builds couple the engine straight to the alternator shaft, which keeps the parts count low and removes belt maintenance entirely, but it also locks the alternator to the engine's exact RPM. If your alternator is rated for a different speed than your engine's efficient operating range, a belt-and-pulley setup lets you gear between the two — a smaller pulley on the engine and a larger one on the alternator slows the alternator down relative to the engine, or the reverse speeds it up. Belts add one more thing to align, tension, and eventually replace, but they buy you flexibility if you're building around a mismatched pair of used parts rather than a matched kit.
Whichever drive method you choose, the coupling guard matters as much as the coupling itself. An exposed shaft or belt spinning at 3,600 RPM is one of the more overlooked hazards on a home-built unit, especially once the frame gets moved around a job site. A simple sheet-metal or expanded-mesh guard bolted over the coupling area costs little and prevents a genuinely serious injury.
Noise is the other variable a home build lets you control that a factory unit doesn't. Beyond the muffler itself, the biggest noise sources are usually an unbaffled intake opening and a frame that transmits engine vibration straight through to the panel skin, which acts like a speaker cone. Routing your cooling air intake through a simple offset baffle, rather than a straight cutout facing the engine, cuts a surprising amount of noise without meaningfully restricting airflow. Rubber isolators between any sheet-metal panels and the frame do the same job for vibration-transmitted noise. Neither change affects output, and both make the unit noticeably more pleasant to stand next to for the several hours a real outage tends to last.
06 Testing and break-in
Run the first start with nothing plugged into the panel. Let the engine idle and warm up, watch the voltmeter settle to its rated output, and listen for anything that sounds like a bearing or belt problem before you introduce any load at all. Once it's holding steady voltage and frequency at no load, bring on a small resistive load first — a work light or a space heater is ideal, since resistive loads don't have the surge current that motors do. Watch how much the voltage and frequency dip when the load switches on, and how quickly they recover; a dip that doesn't recover within a second or two usually points back to the governor, not the wiring.
Only after resistive loads test clean should you try a motor load, like a drill or a shop vacuum, which will pull several times its running wattage for the first fraction of a second as the motor starts. This is where an undersized engine shows itself immediately, either by bogging down audibly or by the voltage sagging hard enough to trip the breaker.
Run the finished unit for a proper break-in period, following the engine manufacturer's break-in schedule for oil change intervals, before you rely on it for anything real. A generator you built yourself is worth the same caution during break-in as a new engine in anything else you own.
07 Size the build to your actual loads
Every appliance draws two different numbers: running watts, which is what it needs continuously, and starting watts, which is the brief surge that motors, compressors, and pumps draw when they first switch on. Your alternator has to be rated above your total running watts for everything you'll run at once, and it also has to be able to cover the single largest starting-watt spike on top of whatever's already running. Add up the appliances you actually plan to power, and size the build to that number plus a working margin, rather than to whatever number sounds impressively large.
Use the calculator below to total up a realistic household or job-site load. Add the items you'll actually run at the same time, enter their running and starting watts — most of that information is printed on the appliance's data plate or in its manual — and the totals will update as you go.
Load calculator
RUNNING + SURGE ESTIMATORRecommended size = total running watts + largest single starting-watt spike among your listed items.
Notice what the calculator is doing: it isn't just adding up running watts, it's adding the single biggest starting-watt spike on top of everything else's running load, because that's the worst moment your alternator will ever face — every other motor already running steady, and one more kicking on. Size the build to survive that moment, and everyday operation takes care of itself.
08 Keeping it running
A home-built generator needs the same upkeep as any small-engine machine, plus a bit of extra attention to the parts you assembled yourself. Change the engine oil on the schedule in its manual, check the air filter before any extended job, and drain the fuel system or run it dry before long storage periods so gum and varnish don't clog the carburetor.
On the electrical side, re-check terminal connections and the frame ground bond every few months — vibration from normal operation is very good at working fasteners loose over time, and a loose ground connection is exactly the kind of fault that only becomes obvious when something goes wrong. Re-torque the coupling and mounting bolts on the same schedule, and keep an eye on the rubber vibration mounts for cracking, since a failed mount lets misalignment creep back into the coupling you carefully set during the build.
Store the finished unit somewhere dry, covered, and away from long-term fuel exposure to the frame's paint or coating. A generator you built to your own spec is worth maintaining to that same standard — it's the difference between a machine that starts on the first pull three years from now and one that becomes a parts donor.
09 Frequently asked questions
Answers to the questions that come up most once people actually start sourcing parts and cutting metal.
01Is it actually cheaper to build a generator than to buy one?
Usually, yes, for mid-size and larger units — a bare engine and a generator head bought separately often cost less than an equivalent finished generator, especially once you factor in that you're not paying for the enclosure, marketing, or retail markup. Small units under about 2,000 watts are the exception, since mass-produced inverter generators in that class are priced close to component cost already.
02Do I need welding skills to build the frame?
No. A welded frame is stiffer and lighter for the same strength, but bolt-together steel tube with corner brackets works fine for a stationary or occasionally-moved unit. If you're new to welding, this is a reasonable first structural project since the joints are low-stress compared to something like a trailer frame.
03Can I use a used engine instead of buying new?
Yes, and it's one of the more common ways to cut cost, as long as you check compression and confirm the engine holds a steady idle before you commit to building around it. Have a small-engine shop compression-test it if you can't do it yourself — an engine that's down on compression will never hold the RPM your alternator needs, no matter how well the rest of the build goes.
04What's the difference between a generator head and an alternator?
In this context they're the same part — "generator head" and "alternator" both refer to the component that converts the engine's spinning shaft into electrical output. The name overlap comes from automotive alternators doing a related job, but a generator head is built for continuous AC output rather than charging a battery.
05How do I know what size alternator I need?
Total the running watts of everything you'd realistically run at once, add the single largest starting-watt surge on top, and size the alternator above that combined number with some working margin. The load calculator earlier in this guide does that math for you once you enter your appliances.
06Can I run sensitive electronics like a laptop or CPAP on a conventional generator?
A well-governed conventional generator with a clean AVR can run most electronics, but the sine wave isn't as clean as what an inverter generator produces, and voltage can dip briefly under sudden load changes. For CPAP machines and other medical equipment, check the manufacturer's tolerance for generator power specifically, and consider adding a small line conditioner or UPS between the outlet and the device as a buffer.
07What gauge wire should I use for the control panel wiring?
Size wire to the breaker's rating, not to your typical draw — 12-gauge stranded copper is the accepted minimum for a 20A 120V circuit, and 10-gauge is safer once you're approaching 30A. When a run is longer than about 25 feet, size up one gauge to keep voltage drop from becoming noticeable at the outlet.
08Do I really need a GFCI outlet if the frame is grounded?
Yes — grounding and GFCI protection do different jobs. The ground bond gives fault current a path back to the frame instead of through a person, while the GFCI outlet watches for current leaking anywhere outside the normal circuit and cuts power in milliseconds. Portable generators are required to have GFCI protection on their 120V receptacles for exactly this reason, and a home build should meet the same standard.
09Can I build a generator that runs on propane instead of gasoline?
Yes, provided your engine either ships propane-ready or accepts a conversion kit matched to its displacement. You'll add a propane regulator and a changeover or dedicated fuel line in place of the gravity-fed gas tank described in this guide, plumbed to the regulator manufacturer's pressure spec. Propane burns cleaner and stores indefinitely, at the tradeoff of slightly lower power output than gasoline from the same engine.
10How much clearance does the engine need for cooling?
Follow the engine manufacturer's cooling airflow diagram rather than guessing — most small air-cooled engines want at least a few inches of open space around the flywheel fan and cooling fins, with an unobstructed path for air to enter and exit. Boxing the engine in tightly with sheet panels for a cleaner look is the most common way home builders accidentally shorten engine life.
11What happens if the engine and alternator shaft speeds don't match?
You gear between them with a belt-and-pulley setup instead of a direct coupling — a smaller pulley on the faster shaft and a larger one on the slower shaft brings the two into the ratio you need. Direct coupling only works cleanly when both components are rated for the same RPM to begin with.
12How do I check that the output frequency is correct?
A frequency meter on the control panel is the most direct way, but a tachometer on the engine works too, since frequency is a direct function of RPM — 3,600 RPM on a standard 2-pole 60Hz alternator, 1,800 RPM on a 4-pole unit. If the frequency drifts under load, the fix is almost always the governor, not the wiring.
13Is it safe to backfeed my house panel from a home-built generator?
Not by plugging into a wall outlet — that practice, sometimes called backfeeding, can energize utility lines and seriously injure repair crews, on top of being illegal in most jurisdictions. If you want to power circuits in your house, install a proper transfer switch by a licensed electrician, which physically isolates your home's wiring from the utility feed before your generator's power ever reaches it.
14How long will a home-built generator run on a full tank?
It depends on tank size and load, but as a rough baseline, a small engine under moderate load burns somewhere around half a gallon to a gallon per hour. Size your tank to the run time you actually need — an overnight outage calls for a bigger tank than a job site you're only running for a few hours at a time.
15What's the most common mistake first-time builders make?
Undersizing the engine relative to the alternator's rated output. It doesn't show up until the first real load test, when the engine bogs down, RPM drops, and voltage sags along with it — by then the frame, wiring, and mounting are all finished and hard to change. Confirm the horsepower-to-wattage ratio before you buy either component, not after.
16Can I add electric start to a pull-start engine?
Many small engines offer an electric-start version of the same block, or a bolt-on starter kit with a matching flywheel ring gear, battery, and solenoid. Check that the specific kit is rated for your engine's displacement before buying, since starter motors sized for a smaller engine can struggle or burn out trying to turn over a larger one.
17How often should I actually run the generator, even if there's no outage?
Run it under some load for 20–30 minutes every month or two, not just at idle, so fuel doesn't go stale in the carburetor and the alternator's bearings and brushes stay in regular use. A generator that only gets started once a year is far more likely to have a fuel or starting problem exactly when you need it most.
10 Conclusion
Building your own portable generator turns a sealed appliance into a machine you understand completely — every bolt, every wire run, every reason it's rated for what it's rated for. Nothing in this build is exotic: an engine that holds a steady RPM, an alternator matched to it in both speed and output, a frame that keeps the two aligned, and a panel wired the way any electrical circuit should be. It's the same three systems every commercial unit hides behind a plastic shell, just built where you can see, service, and eventually replace every part of it yourself.
If you take one thing from this guide into the garage, make it this: size the engine to the alternator before you buy either one, and don't skip the grounding step no matter how far along the build feels. Everything else — the frame dimensions, the wheel kit, the panel layout — has room for judgment calls and personal preference. Those two decisions don't.
Work through the steps in order, test with resistive loads before motor loads, and run the calculator against your real appliances rather than a round number that sounds safe. Do that, and you'll end up with a generator that's not just cheaper than the equivalent off-the-shelf model, but one you can actually repair yourself the day something eventually needs it.
Discussion
No comments yet. Be the first to join the conversation!