
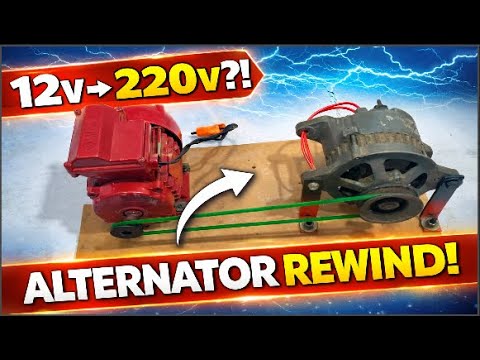
Transforming a Car Alternator into a 220V Generator
Introduction to Rewinding a Car Alternator
A car alternator is normally designed to generate low-voltage electricity for automotive systems, but many DIY enthusiasts and engineering hobbyists have explored the possibility of modifying it to produce 220 volts of power. The idea may sound surprising at first because alternators are usually associated with charging a 12-volt battery and supporting headlights, radios, climate systems, and other vehicle electronics. However, at its core, an alternator is simply a compact electrical generator that converts mechanical motion into electrical energy through electromagnetic induction. Inside the unit, a spinning magnetic rotor moves around stationary copper windings called the stator, creating alternating current that is later converted into direct current for vehicle use. By rewinding the stator with a different number of copper wire turns, builders can significantly change the electrical characteristics of the alternator and increase its voltage output. This concept has become increasingly popular among off-grid experimenters, DIY energy builders, and students interested in learning practical electrical engineering. Rising energy costs and interest in independent power systems have motivated many people to investigate low-cost alternatives to commercial generators, and modifying an old alternator provides an affordable opportunity to explore how electricity is produced and controlled. The project is also valuable from an educational perspective because it teaches the relationship between voltage, current, resistance, magnetic fields, and rotational speed in a hands-on way that textbooks alone cannot provide. At the same time, it is important to recognize that rewinding an alternator for 220V output is an advanced experiment rather than a guaranteed replacement for a commercial generator. Higher voltage can create additional heat, reduce current output, and place stress on the internal components of the alternator. Safety is therefore critical throughout the process. High voltage can cause severe electric shock, rotating machinery can become dangerous if handled carelessly, and poor insulation can create fire hazards or short circuits. Anyone attempting this modification must use protective equipment, insulated tools, and proper testing methods while approaching the project with patience and caution. Although the experiment has limitations, it offers valuable technical experience and helps builders understand how electrical systems function in real-world conditions. For hobbyists, engineering students, and curious tinkerers, rewinding a car alternator is more than a simple DIY project because it demonstrates how common mechanical devices can be transformed into educational tools and experimental energy systems through careful design and practical experimentation.
Understanding the Internal Working Principles
Before attempting to modify an alternator, it is essential to understand how its internal components function together to produce electricity. A typical automotive alternator contains five major elements: the rotor, stator, voltage regulator, rectifier, and brush assembly. The rotor acts as a rotating electromagnet that spins at high speed when driven by the vehicle’s engine belt. Current supplied to the rotor creates a magnetic field, and as this magnetic field rotates inside the stator, electrical energy is generated through electromagnetic induction. The stator contains multiple copper windings arranged in a three-phase configuration, and these windings are responsible for producing the actual electrical output of the alternator. When the magnetic field from the rotor sweeps across the stator windings, electrons begin moving through the copper wire, generating alternating current. The amount of voltage produced depends on several important factors, including the strength of the magnetic field, the speed of rotation, and the number of turns in the stator windings. This is why rewinding the stator becomes the key step in increasing voltage output. By adding more turns of wire, builders can increase the voltage generated during operation, although this often reduces the available current and creates more resistance and heat. The voltage regulator is another critical component because it controls the current flowing into the rotor and keeps the electrical output stable despite changes in engine speed. In automotive use, the regulator prevents overcharging and maintains a safe operating range of around 13.5 to 14.5 volts. The rectifier then converts the internally generated alternating current into direct current so it can charge the battery and power vehicle electronics. Without the rectifier, most automotive electrical systems would not function properly. Brushes and slip rings provide continuous electrical contact to the spinning rotor, allowing the magnetic field to remain energized while the rotor rotates. Understanding these relationships is important because every modification made during rewinding directly affects how the alternator behaves electrically and mechanically. Increasing the number of winding turns can raise voltage, but it also increases resistance, which leads to additional heat generation and reduced efficiency. Rotational speed also plays a major role because voltage rises as the rotor spins faster. This means a modified alternator may require higher RPM to reach the target of 220 volts. However, excessive speed can strain bearings and other internal components. Heat becomes one of the greatest limitations because automotive alternators were never designed for continuous high-voltage operation. Insulation materials, cooling systems, and wire thicknesses were originally optimized for low-voltage charging applications rather than experimental power generation. Despite these challenges, understanding the science behind electromagnetic induction allows builders to approach the project with greater confidence and make more informed design decisions. Once the principles of magnetic fields, coil windings, voltage regulation, and rotational speed become clear, rewinding an alternator changes from a mysterious process into a practical engineering experiment grounded in well-understood electrical theory.
Tools, Materials, and Safety Preparation
A successful rewinding project depends heavily on preparation, organization, and the use of proper tools and materials. Before disassembling the alternator, builders should gather everything required for the process to avoid interruptions and reduce the likelihood of mistakes. One of the most important tools is a reliable multimeter capable of measuring voltage, resistance, and continuity. This device is essential for testing the original alternator, verifying the integrity of new windings, and safely monitoring electrical output during final testing. A bearing puller is also highly recommended because alternator bearings are often tightly pressed into place, and attempting to remove them without proper equipment can damage the housing or rotor shaft. Soldering tools are equally important since strong electrical connections are necessary for stable performance and reduced resistance. Poor solder joints create heat, waste energy, and may fail under load, so builders should use high-quality solder and a temperature-controlled soldering iron whenever possible. Magnet wire with heat-resistant enamel insulation is the primary material used for rewinding the stator. Choosing the correct wire gauge is extremely important because thinner wire allows more turns for higher voltage but reduces current capacity and increases resistance. Many experienced builders prefer high-temperature copper wire because it can tolerate the additional thermal stress generated during high-voltage operation. Safety equipment should never be ignored during this process. Protective gloves and safety goggles help prevent injury from sharp edges, metal fragments, and accidental electrical contact. A clean, well-lit, and ventilated workspace is also essential because rewinding requires careful attention to detail and often involves soldering fumes or insulating varnish. Builders should organize bolts, washers, and small components in separate containers during disassembly to simplify reassembly later. Choosing the right alternator is another important consideration. Older alternator models are often easier to modify because they contain fewer integrated electronic systems and provide more internal space for custom windings. Salvaged alternators from scrap yards can work well if they are inspected carefully for excessive corrosion, burnt windings, or worn bearings. Before removing the original windings, builders should document the factory winding pattern using photos and notes because these references are extremely useful during rewinding. One of the biggest dangers in this project is creating hidden electrical shorts caused by damaged wire insulation. Even a small break in the enamel coating can allow adjacent wires to touch, producing intense heat and potentially destroying the alternator during testing. To reduce this risk, builders often use insulating paper, slot liners, or electrical varnish to separate and protect the coils. Fire safety is also extremely important because modified alternators can generate significant heat. A Class C fire extinguisher should always be available nearby, and initial testing should never occur near flammable materials. Beginners commonly make mistakes such as winding coils unevenly, rushing soldering work, or testing the alternator at high speed too quickly. Gradual testing is much safer because it allows problems to be identified before major damage occurs. Proper preparation may not seem exciting compared to the rewinding itself, but it is often the most important stage of the entire project because good organization, quality materials, and strict safety habits dramatically improve both the reliability of the alternator and the overall learning experience.
Step-by-Step Rewinding and Testing Process
The actual rewinding process is where theoretical knowledge becomes practical engineering work. The first step involves removing the alternator safely from the vehicle by disconnecting the battery, loosening the drive belt, and carefully labeling all electrical connections. Once the alternator is placed on the workbench, the housing can be opened by removing the long bolts that hold the two halves together. Builders should separate the housing gently to avoid cracking the aluminum casing and should inspect the internal components for signs of overheating, damaged insulation, worn brushes, or rough bearings. Any damaged mechanical parts should be replaced before continuing because rebuilding around faulty hardware can compromise the entire project. After inspection, the original stator windings must be removed carefully. These windings are usually secured with hardened varnish, so many builders cut the copper into smaller sections and pull it out gradually rather than using excessive force. Some also apply controlled heat with a heat gun to soften the varnish and simplify removal. During this stage, it is critical to avoid scratching or damaging the laminated iron core because imperfections can reduce magnetic efficiency and create insulation problems later. Once the old copper is removed, the stator slots should be cleaned thoroughly to remove debris, varnish residue, and sharp edges that might damage the new wire insulation. The next stage involves calculating the new winding configuration. Builders usually begin by counting the original winding turns and then estimating how many additional turns are needed to increase voltage output toward 220 volts. High-temperature magnet wire is then wound into the stator slots in a consistent and organized pattern. Maintaining even tension is important because loose windings may vibrate during operation while overly tight windings can damage the insulation. Most automotive alternators use a three-phase design, so preserving the proper phase arrangement is essential for balanced output. After each coil is installed, insulating materials and varnish are often applied to secure the windings and improve durability. Once rewinding is complete, the alternator is carefully reassembled. The rotor must spin freely inside the stator without contact, and all bolts should be tightened evenly to maintain alignment. Before powering the alternator, builders should perform continuity and resistance checks with a multimeter to ensure there are no shorts or broken connections. Testing typically involves spinning the alternator using a drill, electric motor, or small engine while monitoring voltage output. Builders should begin at low RPM and gradually increase speed while observing temperature, vibration, and electrical performance. As speed increases, voltage output usually rises significantly beyond normal automotive levels. Reaching values near or above 220 volts can be an exciting moment because it confirms that the rewinding process successfully altered the alternator’s electrical characteristics. However, testing should remain controlled and cautious because heat buildup can occur quickly. Some builders add external voltage regulators, cooling fans, or inverters to improve performance and produce cleaner output for practical use. Every modification should be tested individually rather than adding multiple upgrades simultaneously. The rewinding process requires patience and precision, but it also provides an extremely rewarding learning experience because it demonstrates how electrical theory directly influences the behavior of real machines and highlights the complex relationship between voltage, current, resistance, and rotational speed.
Results, Challenges, and Practical Applications
After the alternator successfully produces high voltage, the final stage involves evaluating its real-world performance, limitations, and possible applications. One of the first observations many builders make is that while the alternator may achieve or exceed 220 volts at certain speeds, maintaining a perfectly stable output can be difficult. Unlike commercial generators specifically engineered for household electricity production, a rewound automotive alternator is highly sensitive to RPM changes. Small fluctuations in rotational speed can cause noticeable changes in voltage, which may limit the system’s ability to power sensitive electronics directly. Heat generation also becomes a major challenge during extended operation. Because the new windings usually contain more turns of thinner wire, electrical resistance increases significantly, converting more energy into heat. Even with internal cooling fans, the alternator may become excessively hot during long periods of use, making temperature monitoring extremely important. Mechanical stress is another limitation because producing higher voltage often requires the alternator to spin faster than it would in normal automotive service. This additional speed places extra strain on bearings, pulleys, and internal components, especially if the alternator was originally salvaged from an older vehicle. Power output capacity must also be considered carefully. Although the alternator may generate 220 volts, it may not produce enough current to operate large appliances or heavy industrial equipment reliably. Instead, modified alternators are generally better suited for small-scale applications such as battery charging, educational demonstrations, emergency backup experiments, or powering low-demand devices. Despite these practical limitations, the project offers significant advantages. It provides a low-cost opportunity to study generator design and electromagnetic principles in a highly interactive way. Builders gain valuable experience in electrical troubleshooting, winding techniques, insulation methods, and safe testing procedures. For engineering students and hobbyists, this hands-on understanding can be far more valuable than theoretical study alone. The project also encourages creativity and customization because builders can experiment with different winding patterns, cooling methods, and regulation systems to improve performance. However, it is important to recognize that rewinding an alternator is time-consuming and requires patience, technical discipline, and strong attention to safety. Commercial generators remain more efficient and reliable for continuous household use because they are specifically designed for stable high-voltage output. Nevertheless, the educational and experimental value of this project is substantial. It demonstrates how a common automotive component can be transformed into a functional high-voltage generator through careful modification and scientific understanding. More importantly, it teaches that experimentation itself is a powerful learning process. Even if the final system is imperfect, the skills gained during disassembly, rewinding, testing, and troubleshooting often become the most valuable outcome of the entire experience. For anyone fascinated by electricity, mechanical systems, and DIY engineering, rewinding a car alternator for 220V output represents both a technical challenge and a memorable journey into the fundamentals of power generation.

Frequently Asked Questions About Rewinding a Car Alternator for 220V Output
| No. | Question | Answer |
|---|---|---|
| 1 | Can a car alternator really produce 220V? | Yes, a car alternator can be modified to produce around 220 volts by rewinding the stator coils and adjusting the winding configuration. However, it requires technical knowledge and careful testing. |
| 2 | What is the purpose of rewinding an alternator? | Rewinding changes the electrical characteristics of the alternator, allowing builders to increase voltage output or customize the generator for experimental and off-grid applications. |
| 3 | Is rewinding a car alternator dangerous? | Yes, the process involves high voltage, rotating machinery, and electrical components that can cause shock, burns, or fire hazards if handled improperly. Safety equipment and proper precautions are essential. |
| 4 | What tools are required to rewind an alternator? | Common tools include a multimeter, soldering iron, bearing puller, insulated copper wire, screwdrivers, protective gloves, and safety goggles. |
| 5 | Does increasing voltage reduce current output? | Generally, yes. Increasing the number of winding turns raises voltage but often reduces current capacity because thinner wire and higher resistance are involved. |
| 6 | Can a rewound alternator power household appliances? | It may power small devices or charge batteries, but most DIY rewound alternators are not reliable enough for heavy household appliances or continuous home use. |
| 7 | What type of wire is best for rewinding? | High-temperature enamel-coated copper magnet wire is recommended because it can handle heat and electrical stress more effectively during operation. |
| 8 | Why does the alternator heat up after rewinding? | Modified windings create more resistance, which produces additional heat during operation. Higher RPM and increased voltage output also contribute to thermal buildup. |
| 9 | Is an older alternator better for DIY rewinding projects? | Yes, older alternators are usually easier to modify because they have simpler designs, fewer electronic components, and more internal space for custom windings. |
| 10 | Is rewinding an alternator worth it? | For learning, experimentation, and DIY engineering experience, absolutely. While it may not replace a commercial generator, it provides valuable hands-on knowledge about electricity and generator design. |
Conclusion
Rewinding a car alternator for 220V output is an ambitious and educational DIY project that combines electrical engineering, mechanical skills, and practical experimentation. While a standard automotive alternator is designed for low-voltage charging applications, modifying its stator windings can significantly change its electrical behavior and demonstrate the principles of electromagnetic induction in a real-world setting. Throughout the process, builders gain valuable insight into how voltage, current, resistance, magnetic fields, and rotational speed interact inside a working generator system.
Although the project can successfully produce high voltage under controlled conditions, it also comes with important limitations and challenges. Heat generation, reduced current capacity, voltage instability, and mechanical stress mean that a rewound alternator is best suited for learning, experimentation, small off-grid setups, and emergency backup applications rather than replacing a professional commercial generator. Safety must remain the highest priority at every stage, especially when working with high-speed rotating parts and potentially dangerous electrical output.
For hobbyists, engineering students, and DIY energy enthusiasts, the true value of this experiment goes far beyond the voltage produced. It encourages creative problem-solving, hands-on technical learning, and a deeper understanding of how electrical generation systems operate. Even if the final build is not perfect, the knowledge and experience gained from rewinding, testing, and troubleshooting an alternator can become the foundation for more advanced energy and engineering projects in the future.
Discussion
No comments yet. Be the first to join the conversation!