
How to Make Electricity Generator at Home – Easy DIY Project
How to Make Electricity Generator at Home (Step-by-Step DIY Guide with Magnets & Coil)
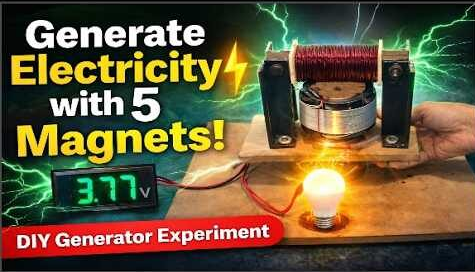
Imagine generating your own electricity at home — not with a massive power plant or expensive solar installation, but with a simple device you built yourself. The idea of producing power from magnets, copper wire, and a rotating shaft feels almost magical the first time you see a bulb light up. Yet the science behind it is surprisingly straightforward. If you’ve ever wondered how to make electricity generator at home, this guide will walk you through the complete process in a clear, practical, and beginner-friendly way.
In recent years, DIY energy projects have exploded in popularity. Rising electricity costs are pushing homeowners to explore alternative power options. At the same time, growing awareness about sustainability and renewable energy has inspired people to understand where their electricity actually comes from.
This guide is designed for students, DIY enthusiasts, science fair participants, and beginners in electronics who want practical experience with electricity generation.
By the end of this article, you will clearly understand how to make electricity generator at home using magnets, a copper coil, and a simple rotating mechanism.
Understanding How to Make Electricity Generator at Home Works (Before You Build One)
Before you start assembling wooden plates, magnets, and copper wire, it’s essential to understand what is actually happening inside a generator. Every successful build begins with understanding electromagnetic induction — the scientific principle that converts motion into electricity.
When a magnetic field moves past a copper wire, electrons inside the wire begin to move, producing electric current. This process is the foundation of all generators, from large hydroelectric plants to small homemade projects.
In this design, six magnets rotate around a stationary copper coil. As the magnets pass the coil, the magnetic field changes continuously, forcing electrons to flow through the wire and generate electricity.
What Is Electromagnetic Induction?
At the heart of this project is a scientific principle called electromagnetic induction.
Role of Magnets in Electricity Generation
Magnets are responsible for creating the magnetic field.
How the Copper Coil Generates Electricity
The copper coil is where electricity is actually generated.
Rotor vs Stator Explained
The rotor is the rotating part of the generator.
Why Alternating Magnet Polarity Matters
Alternating polarity of the magnets is extremely important.
Materials and Tools Needed to Make a Generator at Home
Before starting your build, gathering the right materials for homemade generator construction is essential. The quality of your components directly affects performance, durability, and safety.
You will need:
- Wooden plates for the frame
- A straight metal shaft
- Six strong magnets
- 1.45 mm copper wire
- Glue and thread
- Screws
- A small electric motor
- Belt and pulley system
- Light bulb for testing
- Drill machine and compass
Most of these items are inexpensive and easy to find locally or salvage from old devices.
Wooden Plates (Main Structure)
Two strong wooden plates form the base and support frame of your generator.
Shaft (Rotating Rod)
The shaft connects the rotating plate (rotor) to the motor.
Six Magnets
Magnets are the heart of magnetic field electricity generation.
Copper Wire for the Coil
The coil must have exactly 37 turns.
Step-by-Step Guide to Building Your DIY Electricity Generator
Step 1 – Cutting Wooden Plates
Start by cutting two wooden plates that will serve as the main structural frame of your generator. Both plates must be exactly the same size to prevent imbalance during rotation.
Measure carefully before cutting, and sand all edges smoothly after shaping the wood. A stable structure improves durability and reduces vibration.
Step 2 – Drilling the Center Shaft Hole
Next, drill a perfectly centered hole in both wooden plates.
Step 3 – Gluing the Structure
Apply high-quality wood adhesive between structural sections.
Step 4 – Reinforcing the Shaft with Wire
Wrap strong wire around the shaft area for additional support.
Step 5 – Dividing the Rotor into 6 Equal Parts
Using a compass, draw a circle on the rotor plate.
Step 6 – Installing the Magnets
Now install the six magnets on the marked sections.
Step 7 – Wrapping Thread and Applying Glue
After installing the magnets, wrap strong thread tightly around the rotor.
Step 8 – Making the Coil
Now create the coil using 1.45 mm copper wire.
Step 9 – Shaping the Coil Properly
After completing 37 turns, gently shape the coil.
Step 10 – Mounting the Coil with the Correct Gap
Fix the coil securely onto the wooden board.
Step 11 – Installing the Motor with Belt and Pulley
Secure the motor onto the wooden base.
Step 12 – Connecting the Light Bulb
Attach the two coil wire ends to the terminals of a small light bulb.
Step 13 – Testing and Observing Output
Turn on the motor and observe the bulb carefully.
Step 14 – What Happens If the Coil Touches the Magnets
If the coil touches the spinning magnets, serious issues can occur.
Common Mistakes, Safety Tips, and How to Improve Efficiency
Building a generator is exciting, but small errors can reduce output or stop the system from working completely.
Common mistakes include:
- Uneven magnet spacing
- Incorrect magnet polarity
- Loose coil winding
- Weak glue bonding
- Belt misalignment
- No proper air gap between the magnets and coil
Always wear safety glasses while drilling and keep hands away from moving parts during testing.
Common DIY Generator Mistakes
Uneven magnet spacing and incorrect polarity are major issues.
Safety Tips While Testing
Always wear safety glasses and avoid touching rotating parts.
How to Improve Generator Efficiency
Use stronger magnets, increase coil turns, and improve alignment.
Practical Uses of a Homemade Generator and Final Thoughts
After successfully assembling your project, the most exciting question is: what can this homemade generator actually power?
Although this compact generator cannot run heavy household appliances, it can successfully power LED lights, small electronics, mini sensors, and educational circuits.
It is also ideal for science fairs, STEM education, and classroom demonstrations because it visually explains electromagnetic induction and renewable energy principles.
With further upgrades such as stronger magnets, additional coils, or improved bearings, the generator’s efficiency can be increased even more.
Powering LED Bulbs
LEDs require very little current, making them ideal for small generator setups.
Science Fair and Educational Uses
This project is perfect for STEM learning and science demonstrations.
Future Improvements and Innovation
Experiment with stronger magnets, more coils, and higher rotational speeds.
Final Thoughts
This project is more than just a simple generator. It represents curiosity, creativity, and practical engineering.
Discussion
No comments yet. Be the first to join the conversation!