
How to Generate Electricity Using Magnets with a Simple DIY Concep
Have you ever wondered if you could generate your own electricity at home using simple materials? For many people, this curiosity begins during a power outage, a school science project, or just the desire to understand how things really work behind the scenes. We rely so much on electricity every day, yet very few of us truly know how it is created. What if you could build a small generator yourself and actually see electricity being produced right in front of you?
The interesting part is that electricity doesn’t always have to come from massive power plants or complex systems. In fact, one of the simplest ways to produce electricity involves something as basic as magnets and motion. When a magnetic field changes near a coil of wire, it creates an electric current. This concept might sound technical at first, but it becomes incredibly easy to understand once you see it in action.
At the heart of this idea is a simple principle: a changing magnetic field can generate electricity. By rotating magnets near a copper coil, we can create that change and produce usable electrical energy. This is the same fundamental concept used in real-world generators, just on a much smaller and more accessible scale.
In this guide, you’ll learn everything you need to build your own simple generator. We’ll cover the materials required, walk through the step-by-step process, explore common mistakes and how to fix them, and share tips to improve efficiency. By the end, you’ll not only understand the science but also be able to create your own working setup. Let’s start by understanding the basic concept behind how to generate electricity using magnets.
Materials You Need to Generate Electricity Using Magnets at Home
One of the best things about this project is how simple and accessible the materials are. You don’t need expensive tools or specialized equipment—most of the items can be found at home, in local markets, or even salvaged from old electronics. This makes it a perfect DIY experiment for beginners who want to explore how to generate electricity using magnets without a big investment.
To make things easier to understand, let’s break the materials into categories and explore why each one matters.
Core Components
The heart of your generator lies in two key elements: the transformer core and the copper wire.
The transformer core is typically made of thin iron plates stacked together. These plates are not just for structure—they play a crucial role in guiding the magnetic field efficiently. Iron is a great conductor of magnetic flux, which means it helps concentrate and direct the magnetic energy toward the coil. Without a proper core, much of the magnetic field would be lost in the air, reducing the efficiency of your generator.
Next comes the copper wire, which is used to create the coil. This is where electricity is actually generated. The thickness of the wire matters more than most beginners realize. A wire around 0.6 mm thickness provides a good balance between resistance and current flow. Thinner wires allow more turns but increase resistance, while thicker wires reduce resistance but limit the number of turns. Both factors directly affect the output, so choosing the right thickness is important for better performance.
Mechanical Components
To bring motion into the system, you’ll need a few mechanical parts.
A 12V motor is used to rotate the magnets. This rotation is essential because electricity is only generated when the magnetic field changes continuously. The motor ensures a steady and consistent movement, which leads to stable output.
The wooden base acts as the foundation of your entire setup. It keeps all components aligned and stable during operation. A shaky or uneven base can cause misalignment, which reduces efficiency and may even damage parts.
A round wooden disk is attached to the motor shaft. This disk serves as a holder for the magnets, allowing them to rotate smoothly and evenly. Proper balance here is critical to avoid vibrations.
Magnetic Components
Magnets are the driving force behind the entire process.
You’ll need a set of strong magnets, and their strength directly affects how much electricity you can generate. Stronger magnets create a more powerful magnetic field, which leads to higher voltage in the coil.
Equally important is how you place them. The magnets should be spaced evenly around the disk to maintain balance and ensure consistent magnetic interaction with the coil. Poor placement can lead to uneven rotation and weak output.
Supporting Materials
These may seem minor, but they play an important role in making your setup reliable.
A PVC frame is used to support the coil, keeping it neat and stable. Without it, the wire could loosen or shift, affecting performance.
Glue and thread are used to secure the magnets firmly in place. This is especially important because the magnets spin at high speed, and any loose component can be dangerous.
Screws and brackets help fix everything securely to the base, ensuring that the system remains stable during operation.
Tips for Sourcing Materials
You don’t have to buy everything new. Old transformers, broken appliances, or scrap electronics are excellent sources for cores and copper wire. Motors can often be found in discarded devices like printers or toys. Using recycled materials not only saves money but also makes the project more accessible.
Common Beginner Mistakes
Many beginners make the mistake of using weak magnets or choosing the wrong wire thickness. Others overlook the importance of a solid base or proper alignment. These small oversights can lead to poor results, even if everything else is done correctly.
By selecting the right materials and understanding their roles, you set a strong foundation for success. Now that everything is ready, let’s move on to the most exciting part—building your generator step by step.
Step-by-Step Guide to Generate Electricity Using Magnets and Coil
Now comes the most exciting part of this entire project—actually building your generator. This is where theory turns into reality, and you get to see how simple materials can come together to produce real electricity. Take your time with each step, because small details make a big difference in the final result.
Step 1: Preparing the Core
Start by taking your transformer core. As mentioned earlier, it is made of thin iron plates stacked together, which helps guide the magnetic field efficiently.
To make space for the rotating magnets, you’ll need to cut the center strip of the core. This modification is important because it allows the magnetic field from the rotating magnets to interact more effectively with the coil.
While doing this, safety should be your top priority. Use proper tools like a grinder, wear protective gloves if possible, and hold the core firmly while cutting. Rushing this step can lead to injury or an uneven cut, which may affect the setup later.
Once the core is prepared, you’ve laid the foundation for efficient magnetic flow.
Step 2: Building Coil Support
Next, attach a PVC frame to the transformer core. This frame will act as the base for winding your copper coil.
Make sure the frame is aligned properly and glued firmly. A stable support is crucial because the coil needs to stay tight and in place during operation. If the frame is loose or tilted, your coil winding will become uneven, which can reduce efficiency.
Think of this step as building a strong backbone for your generator.
Step 3: Motor Installation
Now take your wooden base and prepare it for the motor. Using a hole cutter, create an opening that perfectly matches the size of your motor.
Insert the motor into the hole so that it fits tightly. It should not wobble or shift when running. Once placed, secure it properly so it stays stable during operation.
Alignment matters more than most beginners realize. If the motor is slightly tilted, the rotating magnets will not pass evenly near the coil, which can reduce the output and create unnecessary vibrations.
A well-installed motor ensures smooth and consistent rotation—the key to generating electricity.
Step 4: Magnet Rotor Setup
Now it’s time to create the rotating magnetic system.
Attach a round wooden disk to the motor shaft. Make sure it is centered and tightly fixed so it rotates smoothly along with the motor.
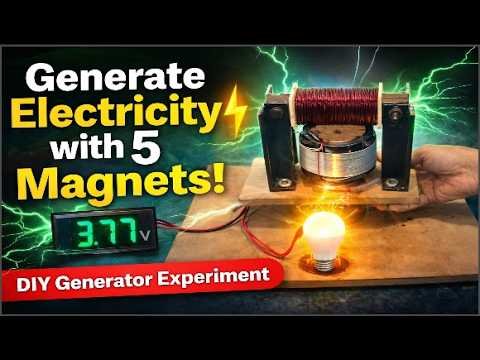
Next, place your five magnets evenly around the disk. Equal spacing is very important for balance. If the magnets are unevenly placed, the rotation will become unstable.
Here’s an interesting concept: even though you are using five magnets, they behave like ten magnetic interactions. This is because each magnet has two poles—north and south. As the disk rotates, both poles pass near the coil, effectively doubling the magnetic changes happening around it.
This increased magnetic interaction is what improves the efficiency of your generator.
Once the magnets are positioned, secure them using thread and glue. Wrap the thread tightly around the magnets and apply glue over it. This ensures they stay firmly in place and do not move or fly off during high-speed rotation.
Step 5: Coil Winding
Now comes one of the most important steps—winding the copper coil.
Take your copper wire and start winding it around the transformer core. Aim for around 300 turns, keeping the wire tight and neatly arranged.
The difference between tight and loose winding is significant. A tightly wound coil allows better magnetic interaction and produces a stronger electrical output. Loose winding, on the other hand, can lead to weak or inconsistent results.
Also, consistency matters. Try to keep each turn aligned and close to the previous one. This improves the overall efficiency of the coil.
Remember, this coil is where electricity is actually generated, so give this step your full attention.
Step 6: Final Assembly
Now bring all the components together.
Place the transformer core near the rotating magnets attached to the motor. The positioning here is critical. The gap between the magnets and the core should be small—but they should not touch.
If the gap is too large, the magnetic field will weaken before reaching the coil. If it’s too small, parts may collide during rotation.
Once you find the right position, secure the core firmly onto the wooden base using screws or brackets. Make sure everything is stable and aligned properly.
At this stage, your generator setup is complete.
Step 7: Testing the Generator
Now comes the moment you’ve been waiting for.
Connect an LED bulb to the two ends of the coil wire. Double-check the connections to make sure they are tight.
Turn on the motor and watch closely.
If everything is set up correctly, you may see the LED glow—your first sign that electricity is being generated. That moment is always exciting, especially when you realize you’ve built a working generator with your own hands.
If the LED doesn’t light up immediately, don’t feel discouraged. Sometimes small adjustments are needed, and that’s completely normal in DIY projects.
What you should expect is either a direct result (light turning on) or signs that electricity is being generated, such as a slight flicker or measurable voltage.
This step-by-step process not only helps you build a generator but also gives you a deeper understanding of how to generate electricity using magnets in a practical way. Every step teaches you something valuable, from precision and alignment to the importance of magnetic interaction.
Now that your setup is complete, let’s move on to the next important part—troubleshooting common issues and making your generator work perfectly.
Common Problems When You Generate Electricity Using Magnets (And How to Fix Them)
If your generator didn’t work perfectly on the first try, don’t worry—you’re not alone. In fact, this is one of those projects where small mistakes are very common, especially for beginners. The good news is that almost every issue has a simple explanation and an easy fix once you understand what’s going on.
Think of this stage not as failure, but as part of the learning process. Troubleshooting is where you truly begin to understand how to generate electricity using magnets in a practical and hands-on way.
Let’s go through the most common problems and how to fix them.
Problem 1: No Light Output
This is the most common issue beginners face. You connect the LED, turn on the motor, and… nothing happens.
The first thing to check is your wiring. Loose wires or poor connections can completely stop the flow of electricity, even if your generator is working internally. Make sure all connections are tight, clean, and properly attached to the coil and LED.
Sometimes the issue is as simple as a slightly disconnected wire. It might look connected, but unless the contact is firm, current won’t flow.
Also, check if your LED is functioning properly. Testing it separately with a battery can help rule out this possibility.
Problem 2: Weak Voltage Output
In some cases, the LED may not light up, but a voltmeter shows a small voltage. This means your generator is working—but not efficiently enough.
One major reason for weak output is a large gap between the magnets and the transformer core. The magnetic field becomes weaker as distance increases, so if the magnets are too far away, the coil won’t receive enough magnetic variation to produce strong electricity.
Try reducing the gap carefully while ensuring the magnets don’t touch the core during rotation.
Another possible cause is weak magnets. Not all magnets are created equal. If you’re using low-strength magnets, the magnetic field may not be strong enough to generate noticeable voltage.
Upgrading to stronger magnets, such as neodymium magnets, can significantly improve performance.
Problem 3: Wrong Coil Direction
This is one of the most important—and often overlooked—factors.
The direction in which you wind the coil directly affects how electricity is generated. If the winding direction is incorrect, the generated current may not flow properly or may cancel itself out.
In simple terms, the coil needs to be wound consistently in one direction so that the magnetic changes produce a usable current.
In the experiment, this exact issue occurred. The first coil failed to produce proper output, even though everything else seemed correct. After testing with another coil, it became clear that the problem was the winding direction. Once corrected, the generator started working as expected.
If your setup isn’t producing results, consider rewinding the coil carefully and consistently.
Problem 4: Misalignment of Components
Alignment plays a bigger role than most people expect.
If the motor is not installed properly or is slightly tilted, the rotating magnets will not pass evenly near the coil. This reduces the efficiency of magnetic interaction and can lead to weak or inconsistent output.
Another issue is uneven magnet placement. If the magnets are not spaced equally on the rotating disk, the system becomes unbalanced. This can cause vibrations, noise, and reduced performance.
Make sure:
- The motor is firmly fixed and straight
- The disk is centered
- The magnets are evenly spaced
A well-aligned setup ensures smooth rotation and maximum efficiency.
Problem 5: Coil Issues
The coil is the heart of your generator, so any issue here can affect the entire system.
If the coil is loosely wound, the magnetic interaction becomes less effective. Loose wires can also shift during operation, leading to inconsistent results.
Another common issue is having too few turns. The number of turns in the coil directly affects how much voltage is generated. If you use fewer turns than required, the output may be too weak to power even a small LED.
To fix this:
- Ensure the coil is tightly wound
- Keep the turns neat and close together
- Aim for around 300 turns or more
Taking extra time on this step can make a huge difference in performance.
Using a Voltmeter for Testing
One of the most helpful tools during troubleshooting is a voltmeter.
Instead of relying only on an LED, connect a voltmeter to your coil wires. This allows you to measure even small amounts of voltage that may not be visible otherwise.
If the voltmeter shows:
- Zero voltage → There may be a wiring issue or incorrect coil direction
- Low voltage → The setup is working, but needs optimization (gap, magnets, coil turns)
You can also use the voltmeter while adjusting the distance between the magnets and the core. As you bring them closer, you should see the voltage increase. This helps you find the optimal position.
Testing with a voltmeter turns guesswork into clear understanding.
Developing the Right Mindset
It’s important to approach this project with the right mindset. DIY experiments rarely work perfectly on the first attempt, and that’s completely normal.
Each problem you encounter teaches you something:
- Why alignment matters
- How magnetic fields behave
- The importance of coil design
Instead of getting frustrated, treat each issue as a clue. The more you troubleshoot, the better you understand the system.
This is exactly how real engineers and scientists work—by testing, adjusting, and improving step by step.
By now, you’ve not only built a generator but also learned how to identify and fix common issues. This deeper understanding is what truly sets this project apart from just following instructions.
Now that your generator is working—or close to working—it’s time to take things to the next level. In the next section, we’ll explore how to improve efficiency and get even better results from your setup.
Advanced Tips to Better Generate Electricity Using Magnets Efficiently
Now that you’ve successfully built a working generator—or at least understand how it works—it’s time to move beyond the basics. This is where things get more interesting. Instead of just making it work, you can start improving how well it works.
At this stage, you shift from being a beginner to someone who is experimenting, optimizing, and thinking like a problem solver. Small changes can lead to noticeable improvements in output, and understanding why these changes work will deepen your knowledge of how to generate electricity using magnets efficiently.
Let’s explore the most effective ways to upgrade your setup.
Improve Magnetic Interaction
The strength of your generator depends heavily on how effectively the magnetic field interacts with the coil.
One of the simplest and most powerful improvements you can make is reducing the gap between the magnets and the core. The closer the magnets are to the coil (without touching), the stronger the magnetic field that passes through it. A stronger magnetic field means more induced voltage.
From a physics perspective, magnetic fields weaken quickly with distance. Even a small increase in gap can significantly reduce performance. That’s why precision matters here.
Alignment is equally important. If your magnets are not passing directly and evenly across the coil, you lose efficiency. Proper alignment ensures that the maximum magnetic field cuts through the coil during rotation.
Think of it like this: the more accurately the magnetic field “hits” the coil, the more electricity you generate.
Upgrade the Coil
Your coil is where all the electrical energy is produced, so improving it can dramatically boost output.
Increasing the number of turns is one of the most effective ways to generate more voltage. Each turn of the wire contributes to the total induced current. So, more turns mean more electricity.
However, there’s a balance. As you increase turns, resistance also increases. This is where wire thickness becomes important.
Using slightly thicker wire reduces resistance, allowing more current to flow. On the other hand, thinner wire allows more turns in the same space. The best approach is to find a balance between the two.
Also, always ensure your winding is tight and uniform. Neat winding improves magnetic interaction and prevents energy loss.
In simple terms:
- More turns = higher voltage
- Better wire = smoother current flow
Enhance Magnet Strength
Magnets are the driving force of your generator. Stronger magnets create stronger magnetic fields, which directly increases electricity generation.
If you started with basic magnets, upgrading to neodymium magnets can make a huge difference. These are much stronger than standard magnets and can significantly boost output even without changing other components.
Placement also plays a key role. Magnets should be evenly spaced and oriented correctly so that their poles interact effectively with the coil.
When stronger magnets pass near the coil, they create a more intense and rapidly changing magnetic field. This leads to higher voltage generation.
Simply put:
Stronger magnets = stronger electricity output
Improve Mechanical Stability
Even if your electrical components are perfect, poor mechanical design can reduce performance.
Vibration is a common issue. If your setup shakes or wobbles during operation, energy is wasted, and alignment is affected. This leads to inconsistent output.
To fix this:
- Ensure the motor is tightly secured
- Use a solid wooden base
- Balance the rotating disk properly
A stable system allows smooth rotation, which is essential for consistent magnetic interaction.
Also, make sure all components are firmly mounted. Loose parts not only reduce efficiency but can also become unsafe during high-speed rotation.
Stability might seem like a small detail, but it has a big impact on performance.
Optimize Core Material
The transformer core plays a crucial role in directing the magnetic field.
Better-quality iron cores allow magnetic fields to pass through more efficiently. This means less energy is lost and more is converted into electricity.
If possible, use laminated iron cores (made of thin stacked sheets). These reduce energy losses caused by eddy currents and improve overall efficiency.
In simple terms, a good core acts like a guide that channels magnetic energy exactly where it’s needed—into the coil.
Better core = better magnetic flow = better electricity generation.
Understanding Why These Improvements Work
All these upgrades are based on one simple principle:
Electricity is generated when a magnetic field changes near a conductor.
So, to improve output, you need to:
- Increase the strength of the magnetic field
- Increase how often it changes
- Improve how efficiently it interacts with the coil
Each improvement you make—stronger magnets, more coil turns, better alignment—enhances one or more of these factors.
That’s why even small adjustments can lead to noticeable results.
Scaling Your Generator
Once your generator is working efficiently, you can start thinking about scaling it.
Instead of just lighting an LED, you can aim to:
- Power small bulbs
- Charge small batteries
- Run low-power devices
To do this, you’ll need to combine multiple improvements:
- More powerful magnets
- Larger coils
- Faster or more efficient rotation
This is essentially how real generators work—by scaling up the same basic principles.
Encourage Experimentation
The most exciting part of this project is that there’s no single “perfect” setup.
You can experiment with:
- Different coil sizes
- Various magnet arrangements
- Alternative core materials
- Different motor speeds
Each variation teaches you something new.
Don’t be afraid to try, fail, and try again. Every adjustment brings you closer to a deeper understanding of how to generate electricity using magnets effectively.
Conclusion
Building a simple generator using magnets is more than just a DIY project—it’s a hands-on journey into the fundamentals of electricity.
From understanding the role of magnets and coils to assembling your setup and troubleshooting problems, each step teaches you something valuable. At its core, the entire process revolves around one powerful idea:
Motion combined with a changing magnetic field produces electricity.
Along the way, you’ve also learned some key lessons that make all the difference. The direction of your coil winding matters more than it seems. The distance between magnets and the core directly affects output. And stability ensures that everything works smoothly and efficiently.
These small details are what turn a basic setup into a successful one.
Most importantly, this project encourages a mindset of exploration. It’s not about getting everything perfect on the first try—it’s about experimenting, learning from mistakes, and improving step by step.
So go ahead—build it, test it, modify it, and make it better. That’s the true spirit of DIY science. Who knows? This simple experiment might be the beginning of a much bigger journey into understanding and creating your own energy solutions.