
How to Make a Powerful DIY electricity generator using old parts | DIY Generator Project
Introduction to Building a DIY electricity generator using old parts
Electricity plays a crucial role in modern life, powering everything from small household devices to large industrial machines. However, many people are interested in learning how electricity can be generated using simple and inexpensive materials. A do-it-yourself generator project is one of the best ways to understand the fundamentals of electricity generation while creating a useful device from parts that might otherwise go to waste.
In this project, we will explore how to build a powerful electricity generator using old and easily available components. The process demonstrates how basic mechanical motion can be converted into electrical energy through magnetic interaction and rotation. By following each step carefully, you can transform common items such as an old DC motor rotor, magnets, and a transformer core into a functional generator capable of producing electricity.
The goal of this project is not only to build a generator but also to understand the basic working principle behind electrical generation. When magnets move relative to a conductive coil or magnetic core, they create a changing magnetic field. This changing magnetic field induces an electric current, which can then be used to power devices.
One of the advantages of this project is that it relies on recycled materials. Many of the parts used in this generator can be taken from old equipment such as broken motors or transformers. This makes the project both economical and environmentally friendly.
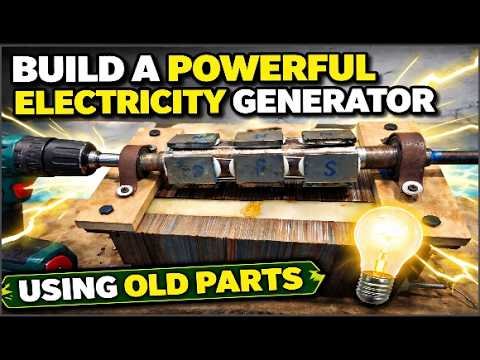
DIY electricity generator using old parts described in this guide uses a rotor with specially arranged neodymium magnets. These magnets create a strong magnetic field that interacts with a transformer core to produce electricity when the rotor spins. The faster the rotor spins, the more electrical energy can be generated.
Throughout the project, careful alignment and balance are important. If the magnets are not positioned correctly or if the rotor is not properly supported, the generator may not operate efficiently. Attention to detail during construction ensures smooth rotation and improved performance.
Another important part of DIY electricity generator using old parts is the frame that holds the components together. A stable frame prevents vibration and keeps all parts aligned. This stability helps the generator run smoothly and safely.
Once DIY electricity generator using old parts is assembled, it can be tested by spinning the rotor manually or with a drill machine. A voltmeter can be connected to measure the voltage output, allowing you to see the electricity produced by the generator.
DIY electricity generator using old parts is ideal for beginners interested in electronics, mechanical construction, and renewable energy concepts. It also provides a hands-on learning experience that demonstrates how electrical energy can be produced using basic principles of magnetism and motion.
By the end of this guide, you will have a clear understanding of how to construct a simple electricity generator using old parts and how each component contributes to the overall system.
Preparing the Rotor and Installing the Magnets
The first and most important step in building this DIY electricity generator using old parts is preparing the rotor. The rotor is the rotating part of the generator, and it plays a key role in creating the magnetic motion required to generate electricity.
To begin, take the rotor from an old DC motor. Many discarded motors still contain usable rotors that can be repurposed for projects like this. Carefully examine the rotor and locate the magnets attached to it. These magnets are part of the original motor design, but they are not needed for this generator setup.
Using appropriate tools, slowly remove all the magnets attached to the rotor. This step should be done carefully to avoid damaging the rotor surface. If the rotor becomes scratched or bent, it may cause imbalance during rotation.
Once the magnets are removed, the rotor should be cleaned thoroughly. Dirt, adhesive residue, or rust should be removed so the surface becomes smooth and ready for the next stage. A clean rotor ensures that the new magnets will attach securely and remain properly aligned.
The generator requires twelve neodymium magnets. These magnets are known for their strong magnetic field, which makes them ideal for electricity generation projects.
The installation of these magnets must follow a specific arrangement. Begin by placing three magnets on the rotor in a straight line. Make sure they are aligned properly and spaced evenly. The north side of these magnets should face upward.
Correct alignment is extremely important because it ensures the magnetic field remains balanced while the rotor spins. If the magnets are uneven or tilted, the generator may produce unstable output.
After positioning the first three magnets, they must be secured so they do not move during operation. To do this, wrap thread around the magnets and the rotor. The thread acts as a binding material that holds the magnets tightly against the rotor surface.
Once the thread is wrapped securely, apply glue over the thread and magnets. The glue strengthens the attachment and ensures that the magnets remain firmly fixed even at high rotational speeds. Allow the glue to dry completely before moving to the next step.
Next, place another set of three magnets on the opposite side of the rotor. These magnets should also have their north side facing upward. Position them directly across from the first set to maintain balance.
This symmetrical placement helps distribute the magnetic forces evenly around the rotor. Balanced magnet placement is essential for smooth rotation and efficient electricity generation.
The next step involves placing another group of three magnets between the previously installed sets. In this case, the south side of the magnets should face upward. This alternating magnetic orientation creates the correct magnetic pattern required for efficient energy generation.
Finally, install the last three magnets on the opposite side of the rotor. These magnets should also have their south side facing upward. Like the earlier sets, they should be aligned carefully and secured with thread and glue.
Once all twelve magnets are installed and properly fixed, the rotor becomes the magnetic core of the generator. When it spins, the magnetic field created by these magnets will interact with the surrounding components to produce electricity.
Building the Generator Structure and Installing the Core
After preparing the rotor, the next step is constructing the structure that will hold the generator components together. This structure must be strong, stable, and precisely aligned to allow the rotor to spin freely.
The first component required for this stage is an old transformer. Transformers contain iron cores that can guide magnetic fields effectively, making them useful in generator designs.
Carefully open the transformer and remove the iron core pieces from inside. These pieces will be reused in the generator setup.
Once the core pieces are removed, select one suitable section and position it near the rotor. The core should be placed in a way that allows the magnetic field from the spinning magnets to interact with it.
Proper alignment between the rotor and the core is essential. If the core is too far away, the magnetic interaction will be weak. If it is too close, the rotor may collide with the core during operation.
To secure the core firmly, a threaded rod is used. Insert the threaded rod through the core and tighten nuts on both sides. This setup locks the core in place and prevents it from moving.
A stable core improves the generator’s efficiency by guiding the magnetic field and concentrating the energy produced during rotation.
Next, the core should be cleaned and prepared. Using a grinder, remove any rust, dirt, or rough edges from the core surface. Grinding also improves the appearance and ensures the core functions properly.
Once the core is cleaned, the next step is building a stand for the generator.
Angle pieces are attached to the four corners of the transformer body to create a stable frame. These metal angles provide structural strength and support the rest of the components.
After installing the angle pieces, two wooden supports are placed across the frame. These wooden pieces act as the mounting platform for the rotor.
The rotor is then placed between the wooden supports. Its shaft must be aligned carefully so it can rotate freely without touching other components.
Proper spacing and alignment are critical at this stage. Even small misalignments can cause friction, vibration, or inefficient energy production.
The rotor bearings are then secured using iron clips. These clips help stabilize the rotor and ensure it remains firmly positioned during rotation.
To further improve stability, small grooves are created in the wooden supports. These grooves allow the bearings to sit securely in place.
Once the bearings are installed in the grooves, the rotor becomes firmly supported and able to rotate smoothly.
A small gap must be maintained between the rotor and the transformer core. This gap prevents physical contact while allowing the magnetic field to interact effectively with the core.
After all components are aligned and secured, the mechanical structure of the generator is complete.
Testing the Generator and Producing Electricity
With DIY electricity generator using old parts fully assembled, the final step is testing the system to verify that it produces electricity.
The first test involves connecting a voltmeter to the generator wires. The voltmeter will measure the voltage produced when the rotor spins.
Attach the two wires from the generator to the terminals of the voltmeter. Make sure the connections are tight so the readings remain accurate.
Once the voltmeter is connected, the rotor can be spun manually to generate electricity. One simple method is to wrap a rope around the rotor shaft and pull it quickly. As the rotor spins, the magnets move past the core and generate a changing magnetic field.
This changing magnetic field induces an electric current, which can be observed on the voltmeter display.
If the generator is working correctly, the voltmeter will show a voltage reading as soon as the rotor begins spinning.
To produce higher output, the rotor can be rotated using a drill machine. The drill is attached to the rotor shaft, allowing it to spin at much higher speeds than manual rotation.
When the drill spins the rotor rapidly, the generator produces a stronger electrical output.
To demonstrate this output, a light bulb can be connected to the generator wires. When the rotor spins fast enough, the electricity generated will power the bulb.
If the bulb lights up, it confirms that the generator is successfully converting mechanical motion into electrical energy.
This experiment clearly demonstrates the basic principle of electromagnetic induction.
The project also opens the door to further improvements. For example, additional circuits can be added to regulate voltage, control frequency, or manage current output.
These control systems are important when using generators to power electronic devices safely.
By understanding how the generator works and experimenting with different configurations, builders can improve efficiency and adapt the design for various applications.
This DIY generator project proves that useful electrical devices can be created using simple materials and creative engineering. It also highlights how discarded components can be repurposed into functional tools.
With patience and careful construction, anyone can build a DIY electricity generator using old partsr that demonstrates the fascinating process of electricity generation.
FAQS
| # | Question | Answer |
|---|---|---|
| 1 | What is a DIY electricity generator? | A DIY electricity generator is a device that converts mechanical energy into electrical energy using simple components such as magnets, a rotor, and a magnetic core. |
| 2 | What parts are needed to build this generator? | The main parts include a DC motor rotor, 12 neodymium magnets, thread, glue, transformer core pieces, a threaded rod, wooden supports, bearings, and a frame. |
| 3 | Why are the original magnets removed from the rotor? | The original magnets are removed so new neodymium magnets can be installed in a specific arrangement that produces a stronger magnetic field for generating electricity. |
| 4 | Why are neodymium magnets used in the generator? | Neodymium magnets are very powerful and create a strong magnetic field, which improves the generator’s efficiency and electricity output. |
| 5 | How many magnets are used in this generator project? | The generator uses 12 neodymium magnets arranged evenly around the rotor. |
| 6 | Why is magnet alignment important? | Proper alignment ensures the magnetic field remains balanced during rotation, allowing the generator to produce stable electricity. |
| 7 | Why is thread wrapped around the magnets? | Thread helps hold the magnets tightly to the rotor and prevents them from moving while the rotor spins. |
| 8 | What is the purpose of applying glue over the thread? | Glue strengthens the attachment of the magnets and ensures they stay securely fixed during operation. |
| 9 | Why is a transformer core used in the generator? | The transformer core helps guide and concentrate the magnetic field, which improves the efficiency of electricity generation. |
| 10 | Why must there be a gap between the rotor and the core? | A small gap prevents physical contact while allowing the magnetic field to interact properly with the core. |
| 11 | What supports the rotor in the generator structure? | The rotor is supported by wooden pieces and bearings that allow it to rotate smoothly and remain stable. |
| 12 | How can the generator be tested after assembly? | The generator can be tested by connecting a voltmeter to measure voltage while spinning the rotor manually or with a drill machine. |
| 13 | Why is a drill machine used in the testing stage? | A drill machine spins the rotor at higher speeds, which increases the electricity output and demonstrates the generator’s capability. |
| 14 | Can the generator power a light bulb? | Yes, if the rotor spins fast enough, the electricity generated can power a small light bulb connected to the generator wires. |
| 15 | Can the generator’s voltage and frequency be controlled? | Yes, additional circuits and control components can be added to regulate voltage, frequency, and current depending on the application. |
You really know how to connect with your readers.
Your tips are practical and easy to apply. Thanks a lot!
Thank you for putting this in a way that anyone can understand.
I appreciate the honesty and openness in your writing.
I appreciate how genuine your writing feels. Thanks for sharing.