
How To Make 5.5 KW Free Energy Generator | 12 Magnets, Single Phase & Three Phase Motor DIY
Introduction
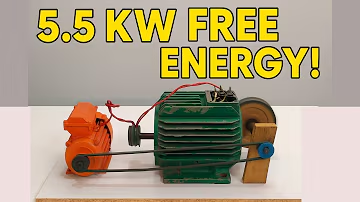
The demand for renewable and independent energy solutions is growing rapidly. Many people are now experimenting with DIY free energy generators to reduce electricity bills and achieve partial or complete energy independence. One such design gaining attention is the 5.5 KW Free Energy Generator, built using 12 neodymium magnets, a single-phase motor, or even a three-phase motor as the alternator base.
This project combines the principles of electromagnetic induction and motor-to-alternator conversion to create a practical device that can generate up to 5500 watts (5.5 kW) of electricity at 220V. While it’s not truly “perpetual motion,” it provides a smart way to harvest energy when coupled with a mechanical input such as manual rotation, turbines, or external prime movers.
In this blog, you will learn step-by-step how to make a 5.5 KW free energy generator at home, what tools and materials are needed, how to set it up with magnets, coils, and motors, and precautions you must take.
How Does a Free Energy Generator Work?
A free energy generator works on the principle of electromagnetic induction, first discovered by Michael Faraday. When a magnetic field cuts across a coil of copper wire, an electric current is induced.
Here’s the basic concept:
Rotor with magnets → A rotating shaft holds 12 neodymium magnets.
Stator with coils → Stationary coils of copper wire are placed around the rotor.
Rotation → As the rotor spins, magnets pass over the coils, producing alternating current (AC).
Rectifier (optional) → Converts AC into DC for battery charging or DC appliances.
Inverter (optional) → Converts DC back into AC for home use (220V).
By using a single-phase or three-phase motor, you essentially repurpose it into a powerful alternator. With careful modification, you can produce 220V, 5.5 KW output.
Materials Required
To build this 5.5 KW Free Energy Generator, you will need:
12 Neodymium magnets (N42–N52 grade, 40x20x10 mm recommended)
Copper wire coils (enameled, 14–18 AWG depending on current requirement)
Single-phase motor (3 HP minimum) or three-phase motor (5–7.5 HP preferred for higher efficiency)
Stator core (from the motor or custom-built laminated iron core)
Rotor shaft (to mount magnets)
Bearings (for smooth rotation)
Rectifier circuit (diode bridge for AC to DC conversion if needed)
Inverter (for converting DC to AC 220V)
Base frame (steel or wooden platform to hold everything in place)
Tools (screwdrivers, drill, epoxy resin, insulation tape, multimeter, grinder, welding machine if needed)
Step-by-Step Guide: Building a 5.5 KW Free Energy Generator
Step 1: Preparing the Motor
Take a single-phase or three-phase motor.
Remove its rotor carefully while keeping the stator intact.
The stator will hold the copper coils that generate electricity.
Step 2: Designing the Rotor
Attach 12 neodymium magnets evenly around the rotor.
Place magnets in alternating polarity (N-S-N-S) to maximize induction.
Secure them with epoxy resin or strong adhesive.
Ensure magnets are balanced to avoid vibration.
Step 3: Coil Winding
Use enameled copper wire (around 14–18 AWG).
Wind coils tightly on the stator slots.
More turns = higher voltage; thicker wire = higher current.
For 220V, ensure enough winding turns based on your design.
Step 4: Reassembling the Motor
Place the rotor with magnets back into the stator.
Make sure there is minimal air gap (1–2 mm) between magnets and coils.
Install bearings for smooth shaft rotation.
Step 5: Electrical Connections
Connect coil ends to an output terminal.
For AC output → connect directly.
For DC output → connect to a rectifier circuit.
Attach wires securely with proper insulation.
Step 6: Voltage & Current Testing
Rotate the shaft manually or with a motor.
Use a multimeter to check output voltage.
At correct RPM, it should produce 220V AC.
Step 7: Power Output Enhancement
Use a three-phase motor if you want a stronger and more stable output.
Three-phase stators have multiple winding sets that increase efficiency.
For 5.5 KW output, the shaft must rotate at higher RPM (1500–3000 depending on design).
Step 8: Connecting to Loads
For charging batteries → connect to rectifier + charge controller.
For running appliances → connect to inverter (DC to AC).
For direct AC appliances → connect regulated 220V output.
Safety Precautions
Working with high voltage (220V and above) can be dangerous. Always:
Wear rubber gloves and insulated shoes.
Avoid touching wires when the system is running.
Keep a circuit breaker or fuse in the system.
Never exceed recommended RPM to avoid rotor failure.
Ensure proper ventilation as coils may heat up.
Applications of 5.5 KW Free Energy Generator
Home backup power (lights, fans, small appliances).
Battery charging systems (solar + generator hybrid).
Off-grid applications (farms, rural areas).
Workshops (for running power tools).
Emergency situations (blackouts, remote locations).
Advantages
Produces 220V, 5.5 KW electricity without fuel.
Uses recycled motor parts and simple materials.
Scalable (can be made smaller or larger).
Low maintenance if built properly.
Works with wind turbines, water wheels, or manual cranks.
Limitations
Not truly “perpetual motion” → still needs rotation input.
Output depends on RPM stability.
Requires careful balancing of magnets.
Heat buildup in coils may reduce efficiency.
Single Phase vs Three Phase Motor DIY
| Feature | Single Phase Motor | Three Phase Motor |
|---|---|---|
| Cost | Cheaper | More expensive |
| Efficiency | Medium | High |
| Power Output | Suitable up to 2–3 KW | Suitable up to 5.5 KW+ |
| Stability | Moderate | Very stable |
| DIY Complexity | Easier | More technical |
Maintenance Tips
Regularly check magnet alignment.
Keep coils dust-free and dry.
Lubricate bearings for smooth rotation.
Inspect wiring insulation.
Replace rectifier diodes if heating occurs.
Conclusion
Building a 5.5 KW Free Energy Generator with 12 magnets, single-phase or three-phase motor is a powerful DIY project for those passionate about renewable energy. With proper design, alignment, and safety precautions, you can achieve a steady 220V output that powers homes, workshops, or off-grid setups.
While it is not truly “free energy” since it requires rotation input, it provides a cost-effective and fuel-free solution for generating reliable electricity. With scaling and hybrid integration, such DIY systems can contribute greatly to energy independence.
FAQs: 5.5 KW Free Energy Generator
| # | FAQ (Question) | Answer |
|---|---|---|
| 1 | What is a 5.5 KW free energy generator? | It is a DIY generator that produces up to 5.5 kilowatts of electricity using magnets and a modified motor as an alternator without needing traditional fuel. |
| 2 | How many magnets are used in this design? | This project uses 12 powerful neodymium magnets arranged in alternating polarity. |
| 3 | Can I use a single-phase motor for this generator? | Yes, a single-phase motor works but is less efficient than a three-phase motor for higher power output. |
| 4 | Why is a three-phase motor better? | Three-phase motors provide higher efficiency, more stability, and can handle larger loads up to 5.5 KW easily. |
| 5 | What wire gauge is recommended for the coils? | 14–18 AWG enameled copper wire is suitable depending on the current requirement. |
| 6 | What voltage can this generator produce? | It is designed to generate around 220 volts AC at proper RPM. |
| 7 | What RPM is required to generate 220V? | Between 1500–2000 RPM depending on coil turns and magnet strength. |
| 8 | Can it power household appliances? | Yes, it can run home appliances under 5.5 KW, but an inverter and voltage regulator are recommended. |
| 9 | Can it charge batteries? | Yes, by adding a rectifier and charge controller, you can charge 12V, 24V, or 48V battery banks. |
| 10 | Does this generator produce AC or DC? | It naturally produces AC, but can be converted to DC using a rectifier. |
| 11 | How do magnets help generate electricity? | Magnets passing over coils create a changing magnetic field that induces current through electromagnetic induction. |
| 12 | Can ferrite magnets be used instead of neodymium? | No, ferrite magnets are too weak and won’t generate sufficient voltage for this design. |
| 13 | How much does it cost to build? | Costs can range from $300 to $800 depending on motor size, magnets, and copper wire. |
| 14 | Is this really “free energy”? | Not truly; it still needs mechanical input (rotation) but does not rely on fuel like gasoline or diesel. |
| 15 | Can I connect it to the grid? | Not directly. It requires synchronization equipment and safety relays to connect to the utility grid. |
| 16 | What are the main applications? | Home backup power, off-grid living, workshops, farms, and emergency power during blackouts. |
| 17 | Is cooling required for coils? | Yes, prolonged use heats the coils, so airflow or cooling fans help prevent overheating. |
| 18 | What inverter size is recommended? | At least a 6 KW inverter is needed to handle the 5.5 KW generator output safely. |
| 19 | Can beginners build this generator? | It is an advanced project; beginners should start with smaller low-voltage DIY generators first. |
| 20 | What is the lifespan of this generator? | With proper care, lubrication, and insulation, it can last for many years with minimal maintenance. |
| 21 | How is single-phase different from three-phase in output? | Single-phase provides moderate power, while three-phase offers more stable and efficient electricity generation. |
| 22 | What prime movers can rotate the generator? | It can be driven by a wind turbine, water wheel, external motor, or manual crank. |
| 23 | Is it dangerous to build? | Yes, 220V is high voltage and can cause shocks. Proper insulation and safety gear are mandatory. |
| 24 | Can it run continuously? | Yes, if cooling and load management are done correctly, it can run for hours. |
| 25 | What is the maximum power output? | With proper design, a three-phase version can generate up to 5.5 KW consistently. |